Just like having a mobile home is having the comfort of the house on wheels, an RV does exactly that: it takes the comfort of the home to wherever your travels take you. But for that convenience, your heating, ventilation, and air-conditioning system must reliably function for the comfort of the folks inside. A defective HVAC might turn your dream trip into a nightmare in extreme weather conditions. Spotting any potential breakdowns can help eliminate them and create a stress-free road trip adventure. This blog will take you through the essential steps required to inspect and service your RV’s HVAC, step by step, so you’ll feel even better about the health of your HVAC. Regular checks save you time and money while ensuring comfort while traveling.
Check for Visible Wear and Tear on the Unit
To begin with, inspect for any visible signs of wear and tear on the HVAC unit. Inspect the exterior for dents, cracks, or loose parts. Minor problems are caught this way before they become a major problem. Look for unusual noises when the HVAC operates; rattling or buzzing noises could indicate loose parts or debris inside. Any rust or corrosion on metal parts is a problem, too. Keep the outer unit dust-free and debris-free; otherwise, it obstructs airflow. Therefore, your HVAC will not overheat. Regular inspections provide you with the earliest signs and probable solutions to any problem in your HVAC system, thereby extending the system’s durability.
Clean or Replace Air Filters for Fresh Airflow
You need to check and change the air filters, one of an HVAC system’s most significant maintenance tasks. These filters catch dust and dirt, preventing it from reaching the air conditioning unit and clogging it. Due to daily usage, these filters become dusty and may hinder airflow towards the air conditioning unit, causing it to work harder than its potential. Locate the filters for the air near the air intake vent for the RV HVAC. Remove the filters from there and inspect for dust accumulation or discoloration. If they look dirty, then it’s cleaning or replacement time. Cleaning is easy with a gentle rinse and then air-drying; however, it is best to replace the filter if it gets damaged or worn out. Fresh filters will help clean the air through your HVAC, keep your unit running well, increase energy efficiency, and induce cooler and cleaner air.
Inspect and Clean the Ductwork and Vents
You can look through the ductwork and vents in the RV that distribute the air. It clears some dust and debris in those places, reducing air flow into your HVAC and making it less efficient. Use a flashlight to check the ducts to see if any blockage is wedged inside. You can use a vacuum or brush on a small amount of dust from the interior of the ducts or compressed air cans from cans intended for blowing out the dust from places in narrow spaces. Always ensure all your vents are free of clogs and left open; closed vents make the HVAC work pretty hard to circulate air around. Regularly cleaning your ducts and vents improves air quality, making your HVAC work harder to maintain comfort inside your RV.
Test the Thermostat and Temperature Controls
The thermostat controls the temperature within your RV; hence, you need to try to see if it works correctly. Turn on your heating and air unit, and set the thermostat to varying points to see how quickly and accurately the unit responds. If the unit is not reacting in any way or if the temperature does not adjust appropriately, the thermostat might be faulty. In some cases, though, replacing the batteries or resetting the thermostat can correct the problem. If the thermostat is older, you can upgrade to a modern one with programmable facilities that regulate temperatures closely and allow for better energy efficiency. Regular checks will help alert you to potential thermostat malfunctions, ensuring that your climate inside the RV is agreeable.
Check Refrigerant Levels and Look for Leaks
The refrigerant is the central part of your HVAC, which allows it to cool the air; thus, if these levels are low, less cooling is obtained. Although it’s a little tricky to top up with refrigerant, and only an expert usually can, you can check leaks yourself. Check the places where the refrigerant lines pass through for oily residue indicating a possible leak. If you find this, it is sensible to get in a technician since refrigerant leakage should not last long. Running an HVAC system with low refrigerant is ineffective and may gradually damage your compressor. Continually examining the refrigerant lines ensures your air conditioner cools efficiently without costly repairs.
Examine Electrical Connections and Wiring
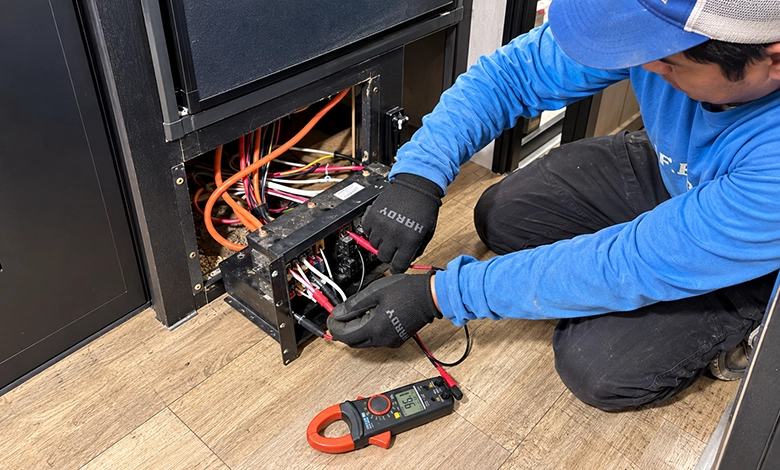
Electricity faults contribute significantly to HVAC malfunction. Therefore, it would be wise to check out the wiring and connections of the cable for any damaged wiring or connections. First, switch the power off from the RV before beginning. Check for loose, frayed, or discolored wire- this can be a potential problem. Ensure that all connections are tight and secure. Check your voltage with a multimeter if you feel comfortable with simple electrical tasks. It should be at levels set in your HVAC guide. Call the electrician for more significant preventive measures if it’s severely damaged or unsure about any part of the wiring. Ensure the electrical system is in control, ensuring your HVAC unit operates safely and effectively.
Clean and Maintain the Evaporator and Condenser Coils
Evaporator and condenser coils work through heat transfer to cool the air. They are an essential component of your HVAC system; however, they collect dust and dirt, compromising efficiency and cooling capacity over time. Check them by opening the HVAC unit and looking for the coils, often located near the intake and exhaust of the unit. You can use a soft-bristled brush or coil cleaner to remove dust. Avoid bending the coils’ fins because it will weaken them and make them less effective. Clean coils help the air-cooling mechanism work faster so you can enjoy the comfort you need for your RV, even at the hottest temperatures.
Test the HVAC System’s Heating Function
If your RV has a heating system, try it before you have any cold adventures. Set it to heat mode and turn the thermostat on to see if it will adequately warm the RV. Pay attention to unusual sounds or heat coming through the vents. If you fail to get adequate warmth or weak airflow, the heating elements may malfunction, or the filters that are supposed to flow air are clogged. Handling these well before the onset of cold weather saves you from many discomforts on the road. Testing the heater before seeing rough roads helps keep your RV warm and ready for whatever season comes.
Schedule Regular Professional Maintenance Checks
While regular self-inspection is worthwhile, a professional check-up can give a more profound inspection of your HVAC. They have the tools and know-how to diagnose problems you could hardly identify, such as refrigerant recharging, detailed electrical inspection, and component replacement. You want to have it serviced by a professional annually when you need it before the peak travel season. Further extended by professional check-ups, regular servicing of your HVAC unit will help diagnose problems beforehand before causing full-cost repair. With this integration of your inspections and professional maintenance, you will always enjoy perfect performance by your HVAC on every adventure.
Conclusion
Your HVAC system can take the open roads without pressure from breakups or an uncomfortable climate. Regular inspections and maintenance ensure your HVAC is ready for whatever the weather throws at it, keeping your RV comfortable and inviting. However, following these simple inspection steps will give you a clear idea of your HVAC system’s needs so you can deal with small issues before they grow out of proportion. So, give your HVAC system a quick check next time you prepare for a trip. It’s a little work, but sometimes it makes your RV feel truly homey on wheels, wherever you may take it off.